


Download and unzip the 3D Model files
Choose the 3D model you would like to get from -3D Vehicle Models- and save the file, for example on your desktop. Before you can use the images the file has to be un-zipped.
After doing this you will find the 3D model and the corresponding 2D vehicle template in the same sub-directory to plan and create the customized vehicle design.
CMO 3D Model, COLOR.JPG colour mask,, TRANS.JPG Transparency mask, AI & CDR 2D Vehicle template
IMPORTANT: Create a separate sub-directory for each 3D project you work on. Save all files of each project in that sub-directory. This guarantees that you can retrieve all files of each project easily and that you will not replace existing files when using the same file name (f. e. design.jpg).
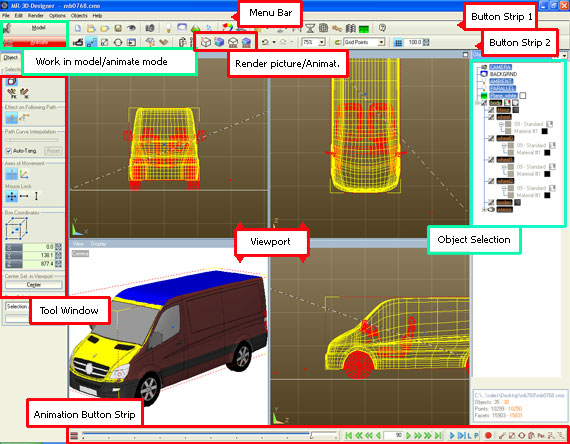
The Work space
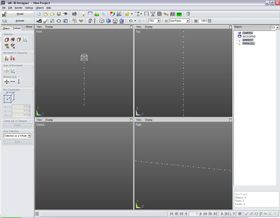
Open the 3D Model
Start the MR 3D Designer.
 Click on the button Load Project from the bottom menu or click on File > Open
from the menu bar.
Click on the button Load Project from the bottom menu or click on File > Open
from the menu bar.
The dialog screen Load Project opens.
Choose the CMO file from the above described sub-directory and confirm with OK.
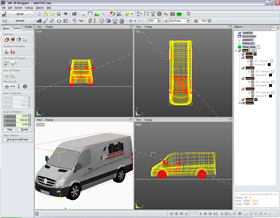
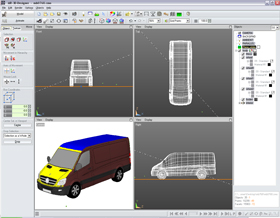 After opening the 3D model the vehicle can be seen in all 4 view port windows.
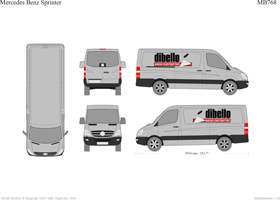
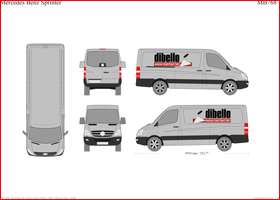
The different colours on the five views of the vehicle show you where to place , your design in your existing graphic software application onto the 2D vehicle template so that your design can be seen in the 3D software.

Open / Import the 2D Vehicle template
Open or Import the 2D vehicle template in your existing design-, graphic- or signmaking application.
The 2D template is available in the file format CDR (CorelDraw) and AI (Adobe Illustrator)
and can also be found in the sub-directory described above.
IMPORTANT: It is substantial to create a 3D design that you do NOT delete any text , or change the size or the position of the views of the vehicle template at all. The reason for this is that the 2D templates have already been connected to the 3D models.
For example if you want to convert your design of the hood (yellow) of this vehicle into a 3D presentation, you have to work on the front view of this vehicle.
Change the colour of the vehicle and place your texts, logos, photos and striping on the various views.
Save the design into the above described directory and use filenames which can be clearly identified.
This file has to be used for later changes and modifications and can be used for production purposes.
Export your design
Export your design as a bitmap file, which will be placed onto the 3D model.
Select all objects within the red frame and click on Export. You can choose from these acceptable file formats: BMP, JPG, PNG, PCX, TGA und TIF.
Within the Export dialog select RGB as the the colour mode and choose a filename which can be clearly identified for later use. z.B. "design.jpg".
IMPORTANT: Export the bitmap file into the same directory where you have saved the un-zipped 3D model as described above.
For a screen image a width of the picture of 2048 pixels would be enough.
For other output devices like printouts ,
you can choose a different width like
5000 pixels.
Import the design into the MR 3D Designer
Switch back to the MR 3D Designer.
 Click on the button Material from the upper button bar Button Material or choose Objects > >Material/Colour from the menu bar.
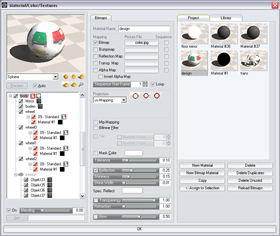
The dialog window Material/Colour/Texture will appear on your screen. Here you can change or modify the textures of the 3D Model.
 On the right side of this dialog window you will find the Material browser with all used materials.
Click on the Material named design.
 In the middle of this dialog windows the view changes to register pages for textures.
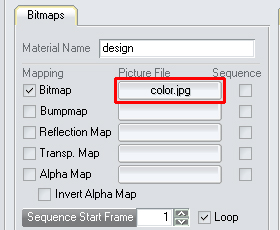
Click on the button "color.jpg" and a window Select Bitmap will open.
Now you can open the designed bitmap file "design.jpgwhich you have saved from your design-, graphic- or sign making application into the directory described above.
Now the file color.jpg will be replaced by your exported bitmap file.
In the View port-Window Camera (left lower corner) you will see a preview of the 3D model wrapped with your design.
Please check if your design is visible at the correct position.
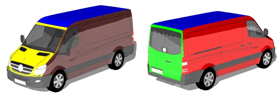
TIP: To twist and turn the 3D model there are 2 alternatives:
Press and hold both mouse buttons in the View port-Window Camera (left lower corner) and move the mouse in the direction you want. This technique means that you circle around the vehicle with the camera. But this might result moving the view into the shadow area.
To keep the light settings there is a better way to twist and turn the 3D model:
Click on the button Animate (far left upper corner)


Right under the View port-Window Camera
(left lower corner) you will find the Animation Button Strip.
With the slider you turn the vehicle to the
centre and the light settings will stay the same.
IMPORTANT: Before adding more changes to the 3D model click on the button Model and return to the Model mode.

![]()
To render a 3D model
 Click on Render Scene in the lower button bar or type F on your keyboard.
The Render window will be opened und and it starts rendering. A preview can be seen.
In the line of status at the lower end of the window you can see, from left to right, the used time, estimated remaining time, actual rendered picture, the final picture number and the status of the actual rendered picture.
After finishing the rendering you can save it as BMP-, JPG-, PNG-, PCX-, TIF- oder TGA-Format on your hard drive for further use like print-outs or attachments for e-mails.
´